Installing The SwissDeck® Floor
 1.) SwissDeck® must be site conditioned at around room temperature 20 ºC (72° F) for a period of 24 hours prior to installation.
2.) Begin at the top left hand corner of the space to be covered.
3.) An expansion gap of ¼" (6mm) should be left at the walls
and any other obstacle such as beams, cabinets and heavy equipment. Tiles should be laid around heavy equipment and
not under them to allow for expansion and contraction.
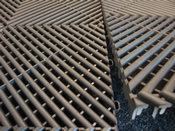
4.) Set the first tile down, taking care to place the "smooth" edges left and top (wall sides). Place the next tile to the right of that, "smooth" edges left and top, interlocking the pegs under the second tile with the loops on the edge of the first tile. A tap with the palm of your hand should be sufficient to seat the tile tightly.
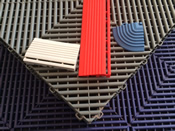
 5.) Continue working towards the right until the first 3 rows are complete. Go back to the left side and install the first 3 rows towards the Garage Door opening. Now install the edging on
the 3 front tiles and close the Garage Door. The edges should
sit behind the closed door. (If the gap between the edge and the door is too large then pull the floor forward to where it should finish and cut-in the tiles to the back of the Garage)
6.) All SwissDeck® products can be cut with the use of a wood cutting saw such as a Circular Saw, Jig Saw, Table Saw or even a hand saw for detailed areas.
7.) Continue to work from left to right and back to front.
8.) Be sure to check alignment along the top and the left side as you progress. Add edging and corners, if necessary, to finish the installation.
9.) A SwissDeck® underlay is available to reduce noise and soften up the floor. This is only recommended where excessive moisture is not present. If the floor will be exposed to excessive water or liquids then the underlay should not be used.


